

LMDeploy量化部署LLM&VLM实践
简介:Huggingface与TurboMind
HuggingFace
HuggingFace是一个高速发展的社区,包括Meta、Google、Microsoft、Amazon在内的超过5000家组织机构在为HuggingFace开源社区贡献代码、数据集和模型。可以认为是一个针对深度学习模型和数据集的在线托管社区,如果你有数据集或者模型想对外分享,网盘又不太方便,就不妨托管在HuggingFace。
托管在HuggingFace社区的模型通常采用HuggingFace格式存储,简写为HF格式。
但是HuggingFace社区的服务器在国外,国内访问不太方便。国内可以使用阿里巴巴的MindScope社区,或者上海AI Lab搭建的OpenXLab社区,上面托管的模型也通常采用HF格式。
TurboMind
TurboMind是LMDeploy团队开发的一款关于LLM推理的高效推理引擎,它的主要功能包括:LLaMa 结构模型的支持,continuous batch 推理模式和可扩展的 KV 缓存管理器。
TurboMind推理引擎仅支持推理TurboMind格式的模型。因此,TurboMind在推理HF格式的模型时,会首先自动将HF格式模型转换为TurboMind格式的模型。该过程在新版本的LMDeploy中是自动进行的,无需用户操作。
几个容易迷惑的点:
TurboMind与LMDeploy的关系:LMDeploy是涵盖了LLM 任务全套轻量化、部署和服务解决方案的集成功能包,TurboMind是LMDeploy的一个推理引擎,是一个子模块。LMDeploy也可以使用pytorch作为推理引擎。
TurboMind与TurboMind模型的关系:TurboMind是推理引擎的名字,TurboMind模型是一种模型存储格式,TurboMind引擎只能推理TurboMind格式的模型。
一、使用Transformer库运行模型
Transformer库是Huggingface社区推出的用于运行HF模型的官方库。
在前置操作中,我们已经下载好了InternLM2-Chat-1.8B的HF模型。下面我们先用Transformer来直接运行InternLM2-Chat-1.8B模型,后面对比一下LMDeploy的使用感受。
创建一个pipeline_transformer.py文件,内容如下:
import torch
from transformers import AutoTokenizer, AutoModelForCausalLM
tokenizer = AutoTokenizer.from_pretrained("/root/models/Shanghai_AI_Laboratory/internlm2-chat-1_8b", trust_remote_code=True)
# Set `torch_dtype=torch.float16` to load model in float16, otherwise it will be loaded as float32 and cause OOM Error.
model = AutoModelForCausalLM.from_pretrained("/root/models/Shanghai_AI_Laboratory/internlm2-chat-1_8b", torch_dtype=torch.float16, trust_remote_code=True).cuda()
model = model.eval()
inp = "hello"
print("[INPUT]", inp)
response, history = model.chat(tokenizer, inp, history=[])
print("[OUTPUT]", response)
inp = "please provide three suggestions about time management"
print("[INPUT]", inp)
response, history = model.chat(tokenizer, inp, history=history)
print("[OUTPUT]", response)激活conda环境:
conda activate lmdeploy运行python代码:
python pipeline_transformer.py得到输出:
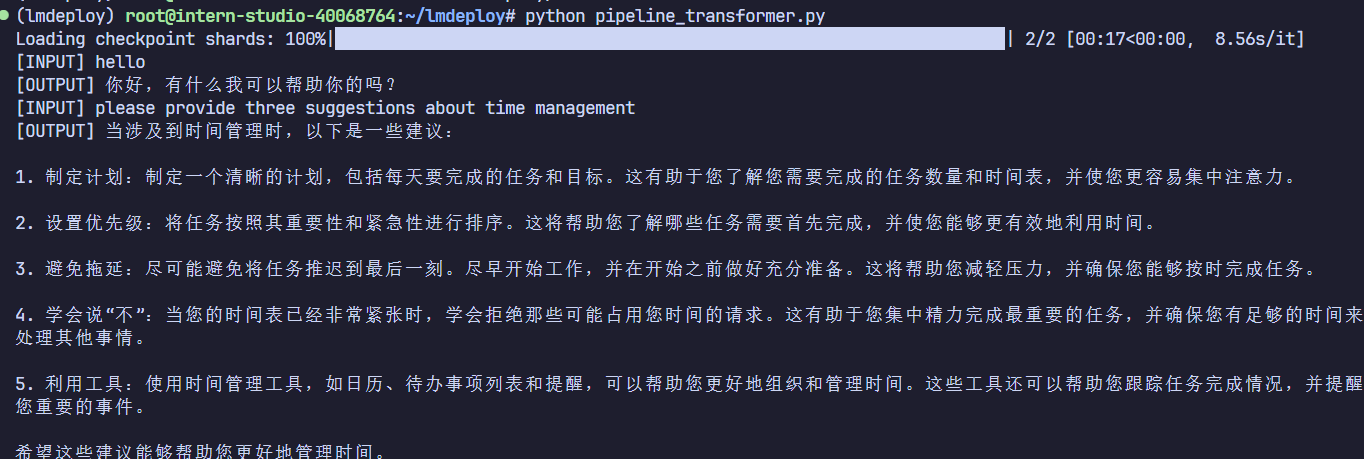
二、使用LMDeploy与模型对话
使用LMDeploy与模型进行对话的通用命令格式为:
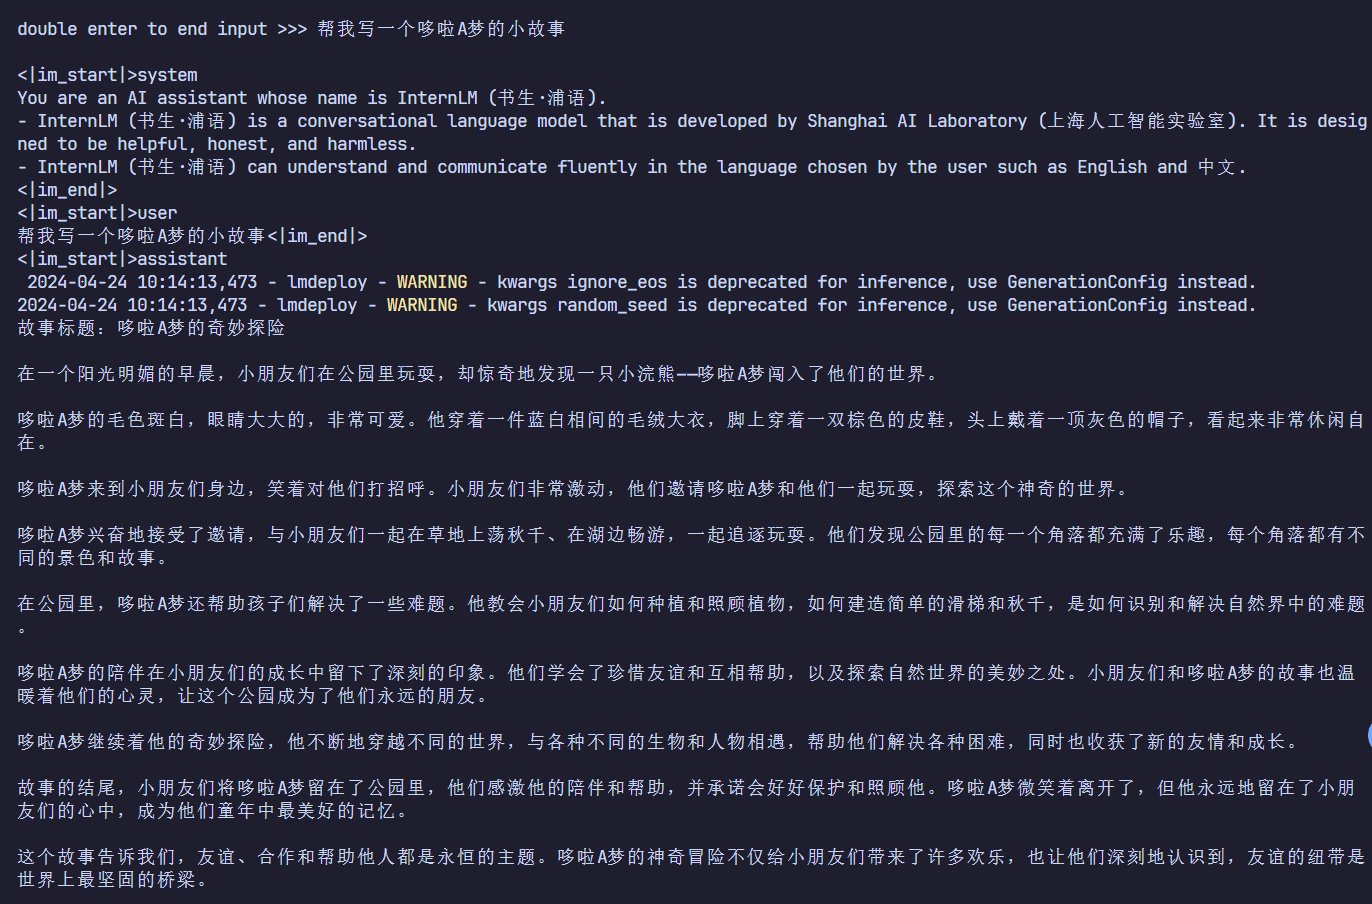
lmdeploy chat [HF格式模型路径/TurboMind格式模型路径]如果想运行1.8B的模型就可以使用:
lmdeploy chat /root/models/Shanghai_AI_Laboratory/internlm2-chat-1_8b如果你仔细观察的话你会发现,lmdeploy推理速度明显比transformers快,是因为TurboMind引擎起了作用。
更多关于LMDeploy的chat功能的参数可通过-h命令查看。
lmdeploy chat -h三、LMDeploy模型量化(lite)
模型量化主要包括 KV8量化和W4A16量化,量化是一种以参数或计算中间结果精度下降换空间节省(以及同时带来的性能提升)的策略。
首先要了解两个概念:
计算密集(compute-bound): 指推理过程中,绝大部分时间消耗在数值计算上;针对计算密集型场景,可以通过使用更快的硬件计算单元来提升计算速度。
访存密集(memory-bound): 指推理过程中,绝大部分时间消耗在数据读取上;针对访存密集型场景,一般通过减少访存次数、提高计算访存比或降低访存量来优化。
常见的 LLM 模型由于 Decoder Only 架构的特性,实际推理时大多数的时间都消耗在了逐 Token 生成阶段(Decoding 阶段),是典型的访存密集型场景。
那么,如何优化 LLM 模型推理中的访存密集问题呢? 我们可以使用KV8量化和W4A16量化。KV8量化是指将逐 Token(Decoding)生成过程中的上下文 K 和 V 中间结果进行 INT8 量化(计算时再反量化),以降低生成过程中的显存占用。W4A16 量化,将 FP16 的模型权重量化为 INT4,Kernel 计算时,访存量直接降为 FP16 模型的 1/4,大幅降低了访存成本。Weight Only 是指仅量化权重,数值计算依然采用 FP16(需要将 INT4 权重反量化)。
3.1 设置最大KV Cache缓存大小
KV Cache是一种缓存技术,通过存储键值对的形式来复用计算结果,以达到提高性能和降低内存消耗的目的。在大规模训练和推理中,KV Cache可以显著减少重复计算量,从而提升模型的推理速度。理想情况下,KV Cache全部存储于显存,以加快访存速度。当显存空间不足时,也可以将KV Cache放在内存,通过缓存管理器控制将当前需要使用的数据放入显存。
模型在运行时,占用的显存可大致分为三部分:模型参数本身占用的显存、KV Cache占用的显存,以及中间运算结果占用的显存。LMDeploy的KV Cache管理器可以通过设置--cache-max-entry-count参数,控制KV缓存占用剩余显存的最大比例。默认的比例为0.8。
下面通过几个例子,来看一下调整--cache-max-entry-count参数的效果。首先保持不加该参数(默认0.8),运行1.8B模型。
lmdeploy chat /root/models/Shanghai_AI_Laboratory/internlm2-chat-1_8b与模型对话,查看右上角资源监视器中的显存占用情况。

此时显存占用为34056MB,这里跟课程中的显存占用相差很大,为什么呢?
因为我使用的是1/2的A100,默认的cache_max_entry_count = 0.8,所以lmdeploy推理时会站总显存的80%。
下面,改变--cache-max-entry-count参数,设为0.5。
lmdeploy chat /root/models/Shanghai_AI_Laboratory/internlm2-chat-1_8b --cache-max-entry-count 0.5与模型对话,再次查看右上角资源监视器中的显存占用情况。

看到显存占用明显降低,变为22984M。
下面来一波“极限”,把--cache-max-entry-count参数设置为0.01,约等于禁止KV Cache占用显存。
lmdeploy chat /root/models/Shanghai_AI_Laboratory/internlm2-chat-1_8b --cache-max-entry-count 0.01
然后与模型对话,可以看到,此时显存占用仅为4872MB,代价是会降低模型推理速度。
3.2 使用W4A16量化
LMDeploy使用AWQ算法,实现模型4bit权重量化。推理引擎TurboMind提供了非常高效的4bit推理cuda kernel,性能是FP16的2.4倍以上。它支持以下NVIDIA显卡:
图灵架构(sm75):20系列、T4
安培架构(sm80,sm86):30系列、A10、A16、A30、A100
Ada Lovelace架构(sm90):40 系列
首先安装一个依赖库。
pip install einops==0.7.0仅需执行一条命令,就可以完成模型量化工作。
lmdeploy lite auto_awq \
   /root/models/Shanghai_AI_Laboratory/internlm2-chat-1_8b \
  --calib-dataset 'ptb' \
  --calib-samples 128 \
  --calib-seqlen 1024 \
  --w-bits 4 \
  --w-group-size 128 \
--work-dir /root/models/Shanghai_AI_Laboratory/internlm2-chat-1_8b-4bit运行时间较长,请耐心等待。量化工作结束后,新的HF模型被保存到internlm2-chat-1_8b-4bit目录。下面使用Chat功能运行W4A16量化后的模型。
lmdeploy chat /root/models/Shanghai_AI_Laboratory/internlm2-chat-1_8b-4bit --model-format awq为了更加明显体会到W4A16的作用,我们将KV Cache比例再次调为0.01,查看显存占用情况。
lmdeploy chat /root/models/Shanghai_AI_Laboratory/internlm2-chat-1_8b-4bit --model-format awq --cache-max-entry-count 0.01
可以看到,显存占用变为2532MB,明显降低。
更多关于LMDeploy的lite功能的参数可通过-h命令查看。
lmdeploy lite -h四、LMDeploy服务(serve)
在课程中将架构图划分为了下面几个模块:
模型推理/服务。主要提供模型本身的推理,一般来说可以和具体业务解耦,专注模型推理本身性能的优化。可以以模块、API等多种方式提供。
API Server。中间协议层,把后端推理/服务通过HTTP,gRPC或其他形式的接口,供前端调用。
Client。可以理解为前端,与用户交互的地方。通过通过网页端/命令行去调用API接口,获取模型推理/服务。
4.1 启动API服务器
通过以下命令启动API服务器,推理internlm2-chat-1_8b模型:
lmdeploy serve api_server \
    /root/models/Shanghai_AI_Laboratory/internlm2-chat-1_8b \
    --model-format hf \
    --quant-policy 0 \
    --server-name 0.0.0.0 \
    --server-port 23333 \
    --tp 1
其中,model-format、quant-policy这些参数是与第三章中量化推理模型一致的;server-name和server-port表示API服务器的服务IP与服务端口;tp参数表示并行数量(GPU数量)。
通过运行以上指令,我们成功启动了API服务器,请勿关闭该窗口,后面我们要新建客户端连接该服务。
可以通过运行一下指令,查看更多参数及使用方法:
lmdeploy serve api_server -h我们可以直接打开http://{host}:23333查看接口的具体使用说明,如下图所示:
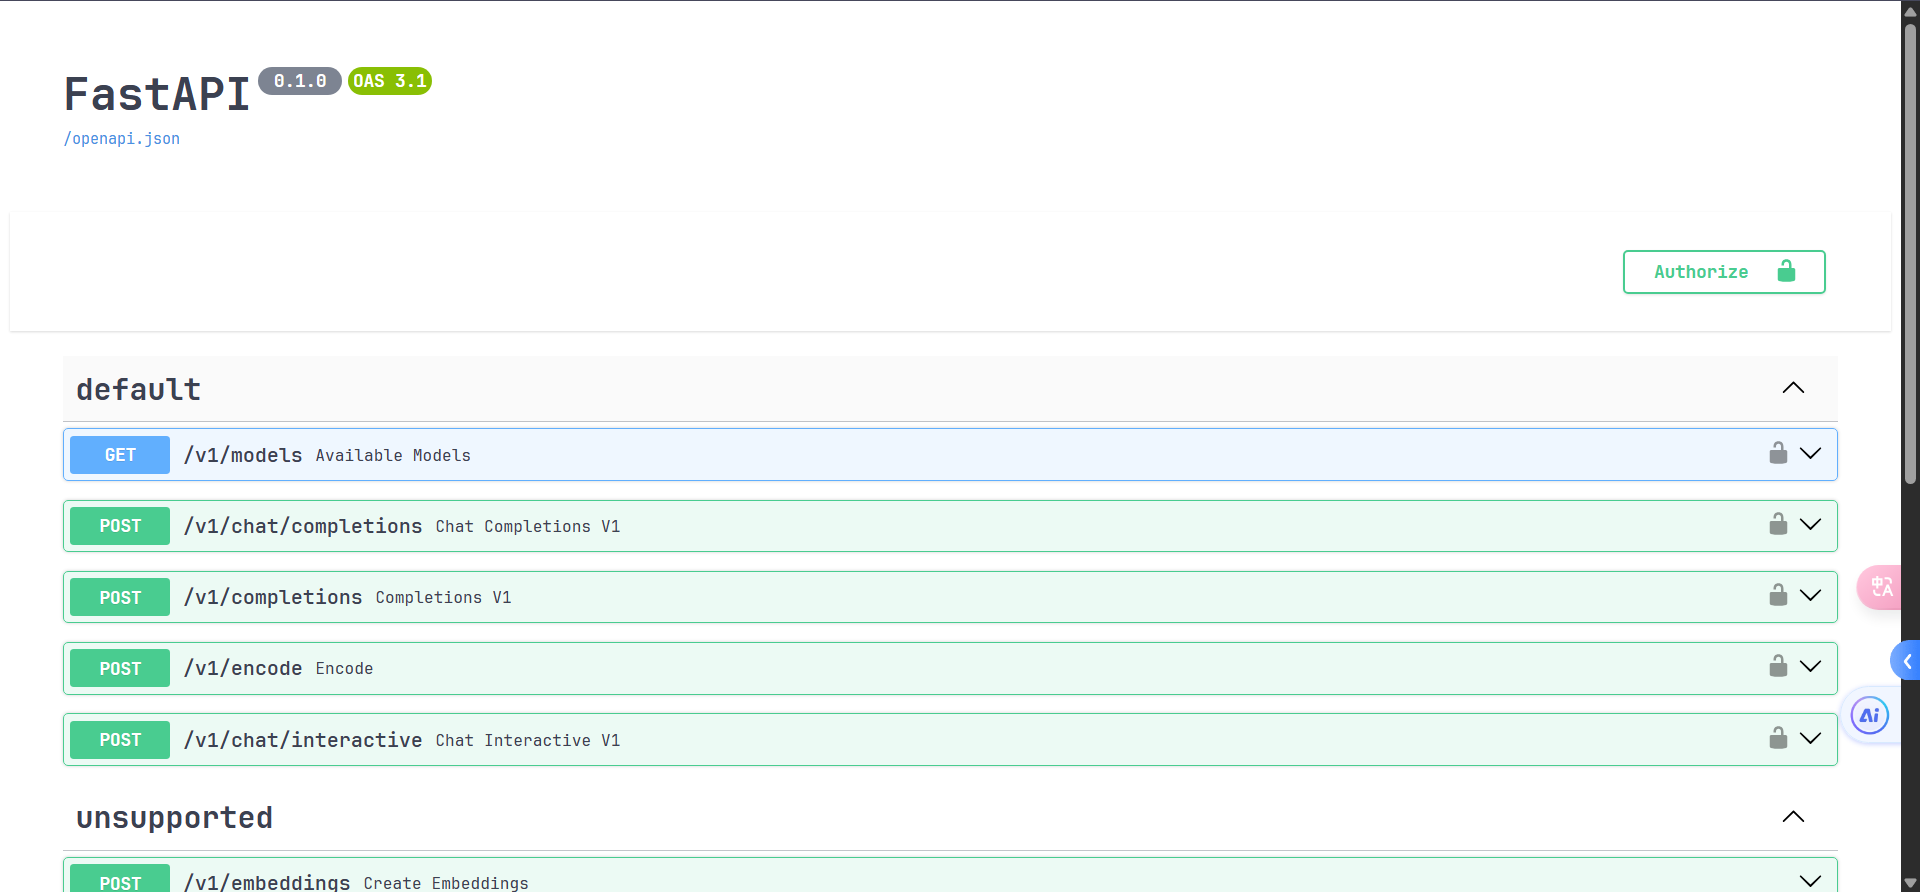
4.2 命令行客户端连接API服务器
我们新建一个终端,输入以下命令来运行命令行客户端:
lmdeploy serve api_client http://localhost:23333运行后,可以通过命令行窗口直接与模型对话:
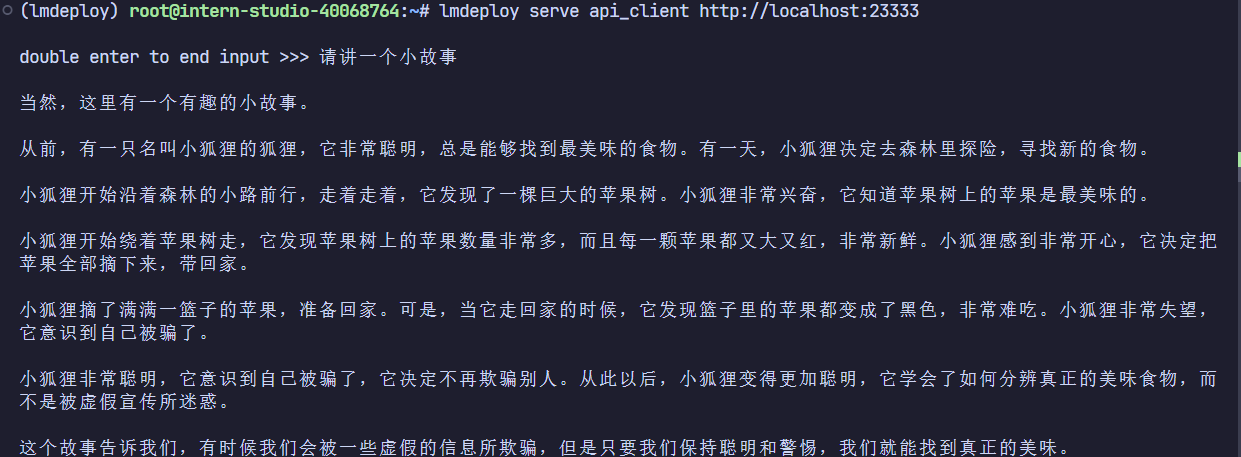
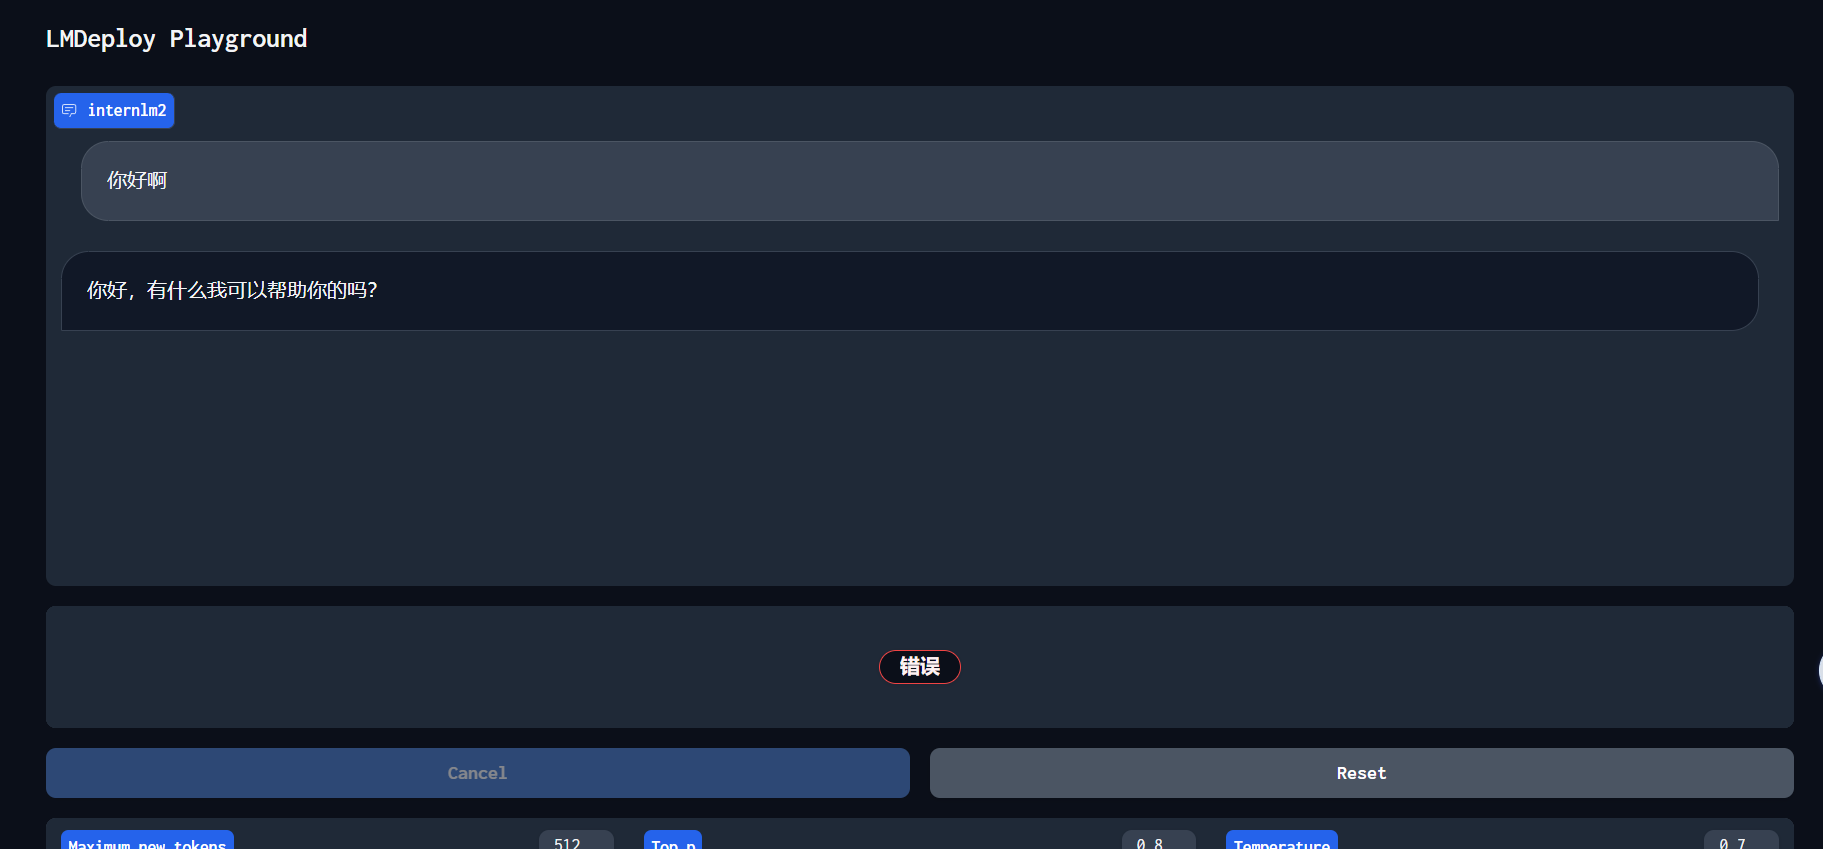
4.3 网页客户端连接API服务器
新建一个终端,使用Gradio作为前端,运行以下命令启动网页客户端。
因为lmdeploy serve 内置了gradio所以可以直接使用
lmdeploy serve gradio http://localhost:23333 \
    --server-name 0.0.0.0 \
    --server-port 6006
如果运行中出现以下报错:
DeprecationWarning: concurrency_count has been deprecated. Set the concurrency_limit directly on event listeners e.g. btn.click(fn, ..., concurrency_limit=10) or gr.Interface(concurrency_limit=10). If necessary, the total number of workers can be configured via `max_threads` in launch().将gradio版本调低到4.0以下即可,或者修改/root/.conda/envs/lmdeploy/lib/python3.10/site-packages/lmdeploy/serve/gradio/api_server_backend.py文件,将concurrency_count=batch_size去掉。
五、Python代码集成
在开发项目时,有时我们需要将大模型推理集成到Python代码里面。
5.1 Python代码集成运行1.8B模型
新建文件pipeline.py内容如下:
from lmdeploy import pipeline
pipe = pipeline('/root/models/Shanghai_AI_Laboratory/internlm2-chat-1_8b')
response = pipe(['Hi, pls intro yourself', '上海是'])
print(response)代码解读:\
第1行,引入lmdeploy的pipeline模块 \
第3行,从目录“./internlm2-chat-1_8b”加载HF模型 \
第4行,运行pipeline,这里采用了批处理的方式,用一个列表包含两个输入,lmdeploy同时推理两个输入,产生两个输出结果,结果返回给response \
第5行,输出response
保存后运行代码文件:
python pipeline.py
5.2 向TurboMind后端传递参数
在上面,我们通过向lmdeploy传递附加参数,实现模型的量化推理,及设置KV Cache最大占用比例。在Python代码中,可以通过创建TurbomindEngineConfig,向lmdeploy传递参数。
以设置KV Cache占用比例为例,新建python文件pipeline_kv.py填入如下内容:
from lmdeploy import pipeline, TurbomindEngineConfig
# 调低 k/v cache内存占比调整为总显存的 20%
backend_config = TurbomindEngineConfig(cache_max_entry_count=0.2)
pipe = pipeline('/root/internlm2-chat-1_8b',
backend_config=backend_config)
response = pipe(['Hi, pls intro yourself', '上海是'])
print(response)保存后运行python代码:
python pipeline_kv.py得到输出结果:

六、使用LMDeploy运行视觉多模态大模型llava
首先激活conda环境。
conda activate lmdeploy安装llava依赖库。
pip install git+https://github.com/haotian-liu/LLaVA.git@4e2277a060da264c4f21b364c867cc622c945874新建一个python文件pipeline_llava.py填入内容如下:
from lmdeploy.vl import load_image
from lmdeploy import pipeline, TurbomindEngineConfig
backend_config = TurbomindEngineConfig(session_len=8192) # 图片分辨率较高时请调高session_len
# pipe = pipeline('liuhaotian/llava-v1.6-vicuna-7b', backend_config=backend_config) 非开发机运行此命令
pipe = pipeline('/share/new_models/liuhaotian/llava-v1.6-vicuna-7b', backend_config=backend_config)
image = load_image('https://raw.githubusercontent.com/open-mmlab/mmdeploy/main/tests/data/tiger.jpeg')
response = pipe(('describe this image', image))
print(response)保存后运行pipeline。
python pipeline_llava.py
我们也可以通过Gradio来运行llava模型。新建python文件gradio_llava.py填入以下内容:
import gradio as gr
from lmdeploy import pipeline, TurbomindEngineConfig
backend_config = TurbomindEngineConfig(session_len=8192) # 图片分辨率较高时请调高session_len
# pipe = pipeline('liuhaotian/llava-v1.6-vicuna-7b', backend_config=backend_config) 非开发机运行此命令
pipe = pipeline('/share/new_models/liuhaotian/llava-v1.6-vicuna-7b', backend_config=backend_config)
def model(image, text):
if image is None:
return [(text, "请上传一张图片。")]
else:
response = pipe((text, image)).text
return [(text, response)]
demo = gr.Interface(fn=model, inputs=[gr.Image(type="pil"), gr.Textbox()], outputs=gr.Chatbot())
demo.launch() 运行python程序。
python gradio_llava.py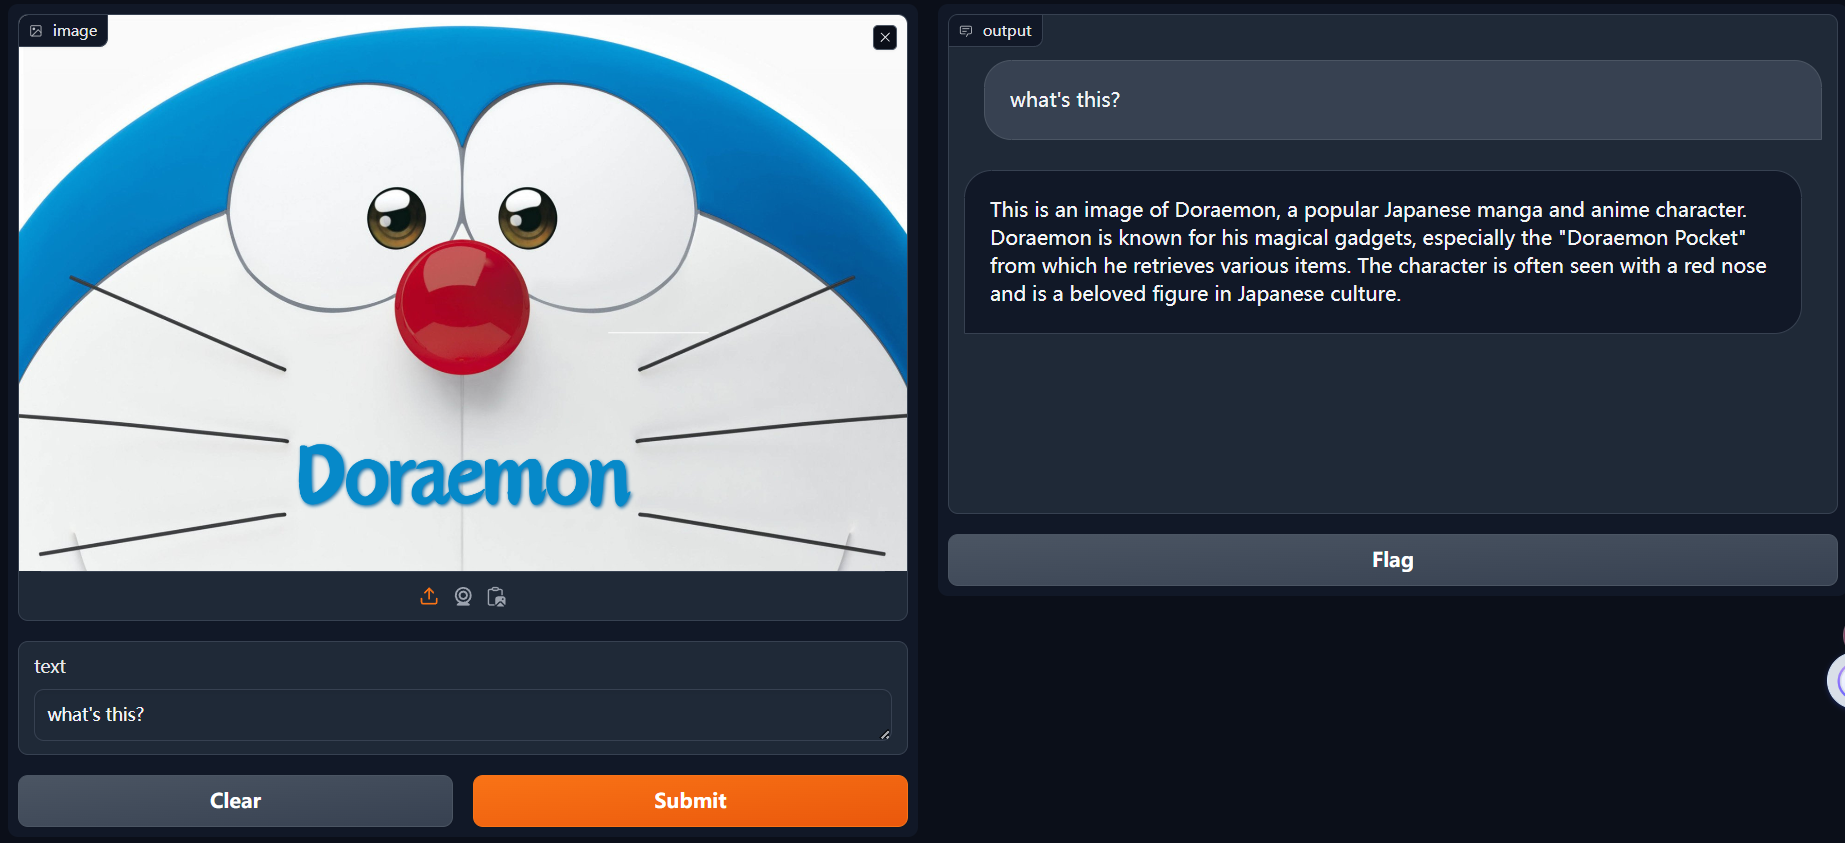
七、定量比较LMDeploy与Transformer库的推理速度差异
为了直观感受LMDeploy与Transformer库推理速度的差异,让我们来编写一个速度测试脚本。测试环境是30%的InternStudio开发机。
先来测试一波Transformer库推理Internlm2-chat-1.8b的速度,新建python文件,命名为benchmark_transformer.py,填入以下内容:
import torch
import datetime
from transformers import AutoTokenizer, AutoModelForCausalLM
tokenizer = AutoTokenizer.from_pretrained("/root/internlm2-chat-1_8b", trust_remote_code=True)
# Set `torch_dtype=torch.float16` to load model in float16, otherwise it will be loaded as float32 and cause OOM Error.
model = AutoModelForCausalLM.from_pretrained("/root/internlm2-chat-1_8b", torch_dtype=torch.float16, trust_remote_code=True).cuda()
model = model.eval()
# warmup
inp = "hello"
for i in range(5):
print("Warm up...[{}/5]".format(i+1))
response, history = model.chat(tokenizer, inp, history=[])
# test speed
inp = "请介绍一下你自己。"
times = 10
total_words = 0
start_time = datetime.datetime.now()
for i in range(times):
response, history = model.chat(tokenizer, inp, history=history)
total_words += len(response)
end_time = datetime.datetime.now()
delta_time = end_time - start_time
delta_time = delta_time.seconds + delta_time.microseconds / 1000000.0
speed = total_words / delta_time
print("Speed: {:.3f} words/s".format(speed))运行python脚本:
python benchmark_transformer.py得到运行结果:

可以看到,Transformer库的推理速度约为82.720 words/s,注意单位是words/s,不是token/s,word和token在数量上可以近似认为成线性关系。
下面来测试一下LMDeploy的推理速度,新建python文件benchmark_lmdeploy.py,填入以下内容:
import datetime
from lmdeploy import pipeline
pipe = pipeline('/root/internlm2-chat-1_8b')
# warmup
inp = "hello"
for i in range(5):
print("Warm up...[{}/5]".format(i+1))
response = pipe([inp])
# test speed
inp = "请介绍一下你自己。"
times = 10
total_words = 0
start_time = datetime.datetime.now()
for i in range(times):
response = pipe([inp])
total_words += len(response[0].text)
end_time = datetime.datetime.now()
delta_time = end_time - start_time
delta_time = delta_time.seconds + delta_time.microseconds / 1000000.0
speed = total_words / delta_time
print("Speed: {:.3f} words/s".format(speed))运行脚本:
python benchmark_lmdeploy.py得到运行结果:
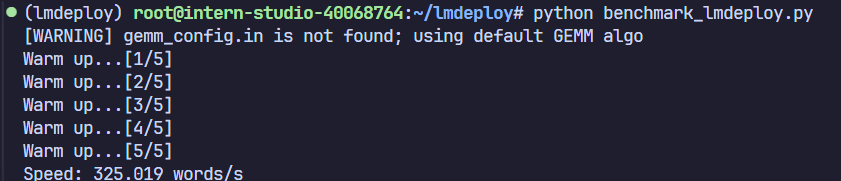
可以看到,LMDeploy的推理速度约为325.019 words/s,是Transformer库的4倍。
- 感谢你赐予我前进的力量
-
 微信
微信  支付宝
支付宝