

集中化运维工具---Ansible和SaltStack
第六章 集中化运维工具---Ansible和SaltStack
一.Ansible
1.1.安装Ansible
安装ansible之前要准备三台虚拟机,而且确保你已经看完书上面的讲解才能知道后面为什么这么做,虚拟机信息如下表
主机名 | IP地址 |
|---|---|
gzh-cs8 | 192.168.88.137 |
gzh-a1 | 192.168.88.138 |
gzh-a2 | 192.168.88.139 |
安装ansible
[root@gzh-cs8 ~]# yum install centos-release-ansible-29.noarch
[root@gzh-cs8 ~]# yum -y install ansible
[root@gzh-cs8 ~]# ansible --version
ansible 2.9.27
  config file = /etc/ansible/ansible.cfg
  configured module search path = ['/root/.ansible/plugins/modules', '/usr/share/ansible/plugins/modules']
  ansible python module location = /usr/lib/python3.6/site-packages/ansible
  executable location = /usr/bin/ansible
  python version = 3.6.8 (default, Mar 19 2021, 05:13:41) [GCC 8.4.1 20200928 (Red Hat 8.4.1-1)]
1.2.配置SSH免密登录
首先在gzh-cs8上面生成一对密钥
[root@gzh-cs8 ~]# ssh-keygen -t rsa
Generating public/private rsa key pair.
Enter file in which to save the key (/root/.ssh/id_rsa):
Created directory '/root/.ssh'.
Enter passphrase (empty for no passphrase):
Enter same passphrase again:
Your identification has been saved in /root/.ssh/id_rsa.
Your public key has been saved in /root/.ssh/id_rsa.pub.
The key fingerprint is:
SHA256:WY3jPArqesmLtWpILQPFQjxezWDy86niz0XvWYc6lgk root@gzh-cs8
The key's randomart image is:
+---[RSA 3072]----+
|o+ o+            |
|.o*. o     o     |
|.ooo      + .    |
|..  o .  = .     |
|. .  +. S +      |
| + .oE.. ...     |
|.ooooo..+o .     |
|o ++=..=+ .      |
| o=*+..+.        |
+----[SHA256]-----+该命令执行完以后会在/root/.ssh下生成一对密钥,id_rsa是私钥,id_rsa.pub是公钥,我们要把公钥发送到另外的两个虚拟机上.
[root@gzh-cs8 .ssh]# ssh-copy-id root@192.168.88.138
/usr/bin/ssh-copy-id: INFO: Source of key(s) to be installed: "/root/.ssh/id_rsa.pub"
The authenticity of host '192.168.88.138 (192.168.88.138)' can't be established.
ECDSA key fingerprint is SHA256:79kcnML33BSqx2Gn4ONmU3FpV4j2JJwgM4SsFmjceP4.
Are you sure you want to continue connecting (yes/no/[fingerprint])? yes
/usr/bin/ssh-copy-id: INFO: attempting to log in with the new key(s), to filter out any that are already installed
/usr/bin/ssh-copy-id: INFO: 1 key(s) remain to be installed -- if you are prompted now it is to install the new keys
root@192.168.88.138's password:
Number of key(s) added: 1
Now try logging into the machine, with: "ssh 'root@192.168.88.138'"
and check to make sure that only the key(s) you wanted were added.
[root@gzh-cs8 .ssh]# ssh-copy-id root@192.168.88.139
/usr/bin/ssh-copy-id: INFO: Source of key(s) to be installed: "/root/.ssh/id_rsa.pub"
The authenticity of host '192.168.88.139 (192.168.88.139)' can't be established.
ECDSA key fingerprint is SHA256:79kcnML33BSqx2Gn4ONmU3FpV4j2JJwgM4SsFmjceP4.
Are you sure you want to continue connecting (yes/no/[fingerprint])? yes
/usr/bin/ssh-copy-id: INFO: attempting to log in with the new key(s), to filter out any that are already installed
/usr/bin/ssh-copy-id: INFO: 1 key(s) remain to be installed -- if you are prompted now it is to install the new keys
root@192.168.88.139's password:
Number of key(s) added: 1
Now try logging into the machine, with: "ssh 'root@192.168.88.139'"
and check to make sure that only the key(s) you wanted were added.然后我们就可以实现gzh-cs8到其他两个机子的免密登录了.
1.3主机目录
我们修改/etc/ansible/hosts文件(建议跟着书一起看),清空改为如下
[root@gzh-cs8 ~]# vim /etc/ansible/hosts
[root@gzh-cs8 ~]# cat /etc/ansible/hosts
[/etc/Ansible/hosts]
192.168.88.138
192.168.88.139
[webservers]
192.168.88.138
192.168.88.139修改完以后我们对节点进行ping操作
[root@gzh-cs8 ~]# ansible webservers -m ping
[WARNING]: Invalid characters were found in group names but not replaced, use -vvvv to see
details
192.168.88.139 | SUCCESS => {
    "ansible_facts": {
        "discovered_interpreter_python": "/usr/libexec/platform-python"
    },
    "changed": false,
    "ping": "pong"
}
192.168.88.138 | SUCCESS => {
    "ansible_facts": {
        "discovered_interpreter_python": "/usr/libexec/platform-python"
    },
    "changed": false,
    "ping": "pong"
}
1.4模块用法
setup模块:查看目录节点的各种信息[root@gzh-cs8 ~]# ansible webservers -m setup [WARNING]: Invalid characters were found in group names but not replaced, use -vvvv to see details 192.168.88.139 | SUCCESS => { "ansible_facts": { "ansible_all_ipv4_addresses": [ "192.168.88.139" ], "ansible_all_ipv6_addresses": [ "fe80::20c:29ff:fed8:8187" ], "ansible_apparmor": { "status": "disabled" }, "ansible_architecture": "x86_64", "ansible_bios_date": "11/12/2020", "ansible_bios_version": "6.00", "ansible_cmdline": { "BOOT_IMAGE": "(hd0,msdos1)/vmlinuz-4.18.0-305.3.1.el8.x86_64", "crashkernel": "auto", "quiet": true, "rd.lvm.lv": "cl/swap", "resume": "/dev/mapper/cl-swap", "rhgb": true, "ro": true, "root": "/dev/mapper/cl-root" }, ......copy模块:将主控端的文件复制到远程主机,只针对文件src 源文件路径 dest 目标文件路径 content 将指定内容覆盖写入到目标主机文件中 force=no 当主控端拷贝的文件名和目标名一致,但是内容不一致,放弃拷贝 force=yes 当主控端拷贝的文件名和目标名一致,但是内容不一致,则进行覆盖 backup=yes 当主控端拷贝的文件名和目标名一致,但是内容不一致,则进行备份 例: # 将/root/test 复制到所有节点的/root目录下 [root@gzh-cs8 ~]# ansible all -m copy -a 'dest=/root src=/root/test' [WARNING]: Invalid characters were found in group names but not replaced, use -vvvv to see details 192.168.88.139 | CHANGED => { "ansible_facts": { "discovered_interpreter_python": "/usr/libexec/platform-python" }, "changed": true, "checksum": "da39a3ee5e6b4b0d3255bfef95601890afd80709", "dest": "/root/test", "gid": 0, "group": "root", "md5sum": "d41d8cd98f00b204e9800998ecf8427e", "mode": "0644", "owner": "root", "secontext": "system_u:object_r:admin_home_t:s0", "size": 0, "src": "/root/.ansible/tmp/ansible-tmp-1698767911.4537575-1825-7466982683333/source", "state": "file", "uid": 0 } 192.168.88.138 | CHANGED => { "ansible_facts": { "discovered_interpreter_python": "/usr/libexec/platform-python" }, "changed": true, "checksum": "da39a3ee5e6b4b0d3255bfef95601890afd80709", "dest": "/root/test", "gid": 0, "group": "root", "md5sum": "d41d8cd98f00b204e9800998ecf8427e", "mode": "0644", "owner": "root", "secontext": "system_u:object_r:admin_home_t:s0", "size": 0, "src": "/root/.ansible/tmp/ansible-tmp-1698767911.4533894-1823-191533046233854/source", "state": "file", "uid": 0 }file模块:创建或者和删除远程主机上的文件或者目录path 指定文件 如果远程主机上没有该文件,则进行创建 state 创建类型 touch 文件 directory 目录 state=absent 删除文件或者目录 link 软连接 src=源文件名 path=目标链接文件名 hard 硬链接 src=源文件名 path=目标链接文件名 以下三个参数,既可以修改,也可以自动添加 mod:权限 可以在添加时设置特殊权限,前提要有执行权限( set 粘滞位) owner:属主 group:属组 例: # 删除刚才复制的文件 [root@gzh-cs8 ~]# ansible all -m file -a 'path=/root/test state=absent' [WARNING]: Invalid characters were found in group names but not replaced, use -vvvv to see details 192.168.88.138 | CHANGED => { "ansible_facts": { "discovered_interpreter_python": "/usr/libexec/platform-python" }, "changed": true, "path": "/root/test", "state": "absent" } 192.168.88.139 | CHANGED => { "ansible_facts": { "discovered_interpreter_python": "/usr/libexec/platform-python" }, "changed": true, "path": "/root/test", "state": "absent" }command模块和shell模块command模块在远程主机上执行指定得命令 如:cat ls ,不能使用特殊得符号 :| > >>语法: ansible 主机清单 -m 模块名 -a '执行命令' creates:当指定文件存在时,后一条命令不执行 / 指定文件不存在,后一条命令执行 removes:当指定文件存在时,后一条命令执行 / 指定文件不存在,后一条命令不执行 # 查看所有节点/root下的文件 [root@gzh-cs8 ~]# ansible all -m command -a 'ls /root' [WARNING]: Invalid characters were found in group names but not replaced, use -vvvv to see details 192.168.88.138 | CHANGED | rc=0 >> anaconda-ks.cfg linux-5.10.10 linux-5.10.10.tar.gz yum.sh 192.168.88.139 | CHANGED | rc=0 >> anaconda-ks.cfg linux-5.10.10 linux-5.10.10.tar.gz yum.shshell模块在远程主机上执行复杂的命令,比较好用得模块语法: ansible 主机清单 -m 模块名 -a '执行命令' # 查看所有节点/root下的文件 [root@gzh-cs8 ~]# ansible all -m shell -a 'ls /root' [WARNING]: Invalid characters were found in group names but not replaced, use -vvvv to see details 192.168.88.139 | CHANGED | rc=0 >> anaconda-ks.cfg linux-5.10.10 linux-5.10.10.tar.gz yum.sh 192.168.88.138 | CHANGED | rc=0 >> anaconda-ks.cfg linux-5.10.10 linux-5.10.10.tar.gz yum.sh
还有很多模块这里就不在写了,大家下去做一下.
最后推荐大家看一下Ansible的中文文档Ansible中文官方文档 .
1.5编写playbook脚本安装Apache并启动
[root@gzh-cs8 playbook]# vim apache.yml
[root@gzh-cs8 playbook]# cat apache.yml
---
- name: 下载yum源
  hosts: 192.168.88.138
  tasks:
    - name: 传输yum
      copy:
        src: /etc/yum.repos.d/Centos-8.repo
        dest: /etc/yum.repos.d/Centos-8.repo


- name: 修改yum源的配置文件
  hosts: 192.168.88.138
  tasks:
    - name: 修改
      command: sed -i 's/8/7/g' /etc/yum.repos.d/Centos-8.repo


- name: 安装httpd服务
  hosts: 192.168.88.138
  tasks:
    - name: 安装
      yum:
        name: httpd
        state: present


- name: 修改httpd的配置文件
  hosts: 192.168.88.138
  tasks:
    - name: 修改
      command: sed -i 's/#ServerName www.example.com:80/ServerName www.example.com:80/' /etc/httpd/conf/httpd.conf

- name: 启动httpd服务
  hosts: 192.168.88.138
  tasks:
    - name: 启动
      service:
        name: httpd
        state: started
        enabled: yes
    - name: 关闭
      service:
        name: firewalld
        state: stopped
        enabled: no
    - name: 重启
      service:
        name: httpd
        state: restarted
[root@gzh-cs8 playbook]# ansible-playbook /etc/ansible/playbook/apache.yml
[WARNING]: Invalid characters were found in group names but not replaced, use -vvvv to see
details

PLAY [下载yum源] ******************************************************************************

TASK [Gathering Facts] *********************************************************************
ok: [192.168.88.138]

TASK [传输yum] *******************************************************************************
ok: [192.168.88.138]

PLAY [修改yum源的配置文件] *************************************************************************

TASK [Gathering Facts] *********************************************************************
ok: [192.168.88.138]

TASK [修改] **********************************************************************************
[WARNING]: Consider using the replace, lineinfile or template module rather than running
'sed'.  If you need to use command because replace, lineinfile or template is insufficient
you can add 'warn: false' to this command task or set 'command_warnings=False' in
ansible.cfg to get rid of this message.
changed: [192.168.88.138]

PLAY [安装httpd服务] ***************************************************************************

TASK [Gathering Facts] *********************************************************************
ok: [192.168.88.138]

TASK [安装] **********************************************************************************
ok: [192.168.88.138]

PLAY [修改httpd的配置文件] ************************************************************************

TASK [Gathering Facts] *********************************************************************
ok: [192.168.88.138]

TASK [修改] **********************************************************************************
changed: [192.168.88.138]

PLAY [启动httpd服务] ***************************************************************************

TASK [Gathering Facts] *********************************************************************
ok: [192.168.88.138]

TASK [启动] **********************************************************************************
changed: [192.168.88.138]

TASK [关闭] **********************************************************************************
changed: [192.168.88.138]

TASK [重启] **********************************************************************************
changed: [192.168.88.138]

PLAY RECAP *********************************************************************************
192.168.88.138             : ok=12   changed=5    unreachable=0    failed=0    skipped=0    rescued=0    ignored=0
1.6编写部署nginx脚本
在编写脚本之前先了解nginx目录结构,和个目录存放的文件,这里参考书上的
Nginx 是一个高性能的开源 Web 服务器和反向代理服务器,通过使用 Ansible,可以实现自动化部署和配置 Nginx,简化服务器的设置和管理,并提高系统的可靠性和性能。
[root@gzh-cs8 ~]# mkdir /etc/ansible/roles/nginx
[root@gzh-cs8 ~]# cd /etc/ansible/roles/nginx/
[root@gzh-cs8 nginx]# ls
[root@gzh-cs8 nginx]# mkdir tasks templates handlers files vars
[root@gzh-cs8 nginx]# ls
files handlers tasks templates
[root@gzh-cs8 nginx]# cd tasks
[root@gzh-cs8 tasks]# vim main.yml
[root@gzh-cs8 tasks]# cat main.yml
---
- name: intall epel
yum: name=epel-release state=latest
- name: install nginx
yum: name=nginx state=latest
- name: copy nginx.conf templte
template: src=nginx.conf.j2 dest=/etc/nginx/nginx.conf
- name: copy index.html
copy: src=/etc/ansible/roles/nginx/files/index.html dest=/usr/share/nginx/html/index.html
notify: start nginx
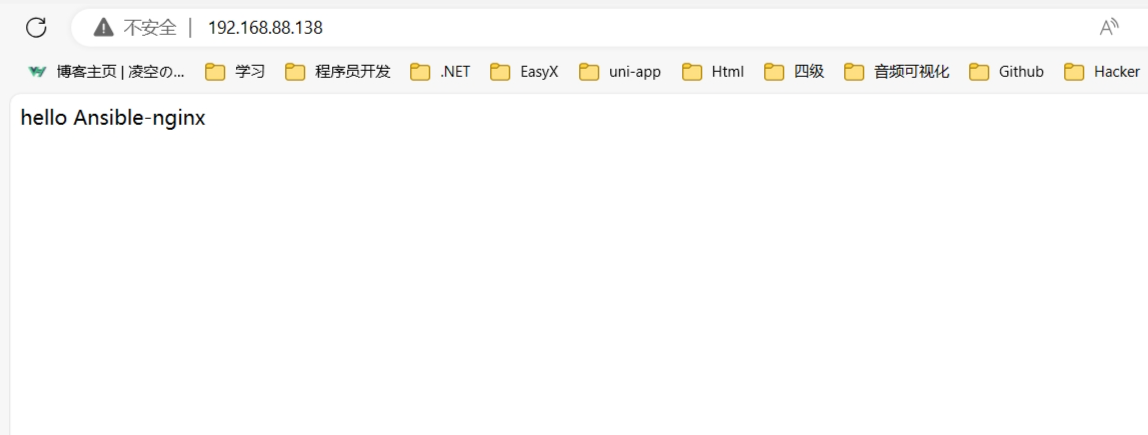
[root@gzh-cs8 files]# vim index.html
[root@gzh-cs8 files]# cat index.html
hello Ansible-nginx
[root@gzh-cs8 handlers]# vim main.yml
[root@gzh-cs8 handlers]# cat main.yml
---
- name: start nginx #和notify的名字必须一样
service: name=nginx state=started
[root@gzh-cs8 handlers]# cd ../vars
[root@gzh-cs8 vars]# vim main.yml
[root@gzh-cs8 vars]# cat main.yml
worker_connections: 2
[root@gzh-cs8 vars]# cd ../templates/
[root@gzh-cs8 templates]# vim nginx.conf.j2
[root@gzh-cs8 templates]# cat nginx.conf.j2
worker_processes 2;
http {
include mime.types;
default_type application/octet-stream;
keepalive_timeout 65;
server {
listen 80;
server_name localhost;
location / {
root html;
index index.html index.htm;
}
}
}
events {
worker_connections 1024; #nginx的最大并发访问量
use epoll; #异步IO
}
[root@gzh-cs8 nginx]# cd ../
[root@gzh-cs8 roles]# vim site.yml
[root@gzh-cs8 roles]# cat
nginx/ site.yml
[root@gzh-cs8 roles]# cat site.yml
---
- hosts: 192.168.88.138
roles:
- nginx
[root@gzh-cs8 roles]# ansible-playbook site.yml
[WARNING]: Invalid characters were found in group names but not replaced, use -vvvv to see
details
PLAY [192.168.88.138] **********************************************************************
TASK [Gathering Facts] *********************************************************************
ok: [192.168.88.138]
TASK [nginx : intall epel] *****************************************************************
changed: [192.168.88.138]
TASK [install nginx] ***********************************************************************
ok: [192.168.88.138]
TASK [copy nginx.conf templte] ************************************************************
ok: [192.168.88.138]
TASK [nginx : copy index.html] *************************************************************
ok: [192.168.88.138]
PLAY RECAP *********************************************************************************
192.168.88.138 : ok=5 changed=1 unreachable=0 failed=0 skipped=0 rescued=0 ignored=0 打开浏览器验证
二.SaltStack
2.1SaltStack的安装与配置
主机信息:
主机名 | IP地址 |
|---|---|
gzh-cs8 | 192.168.88.137 |
gzh-a1 | 192.168.88.138 |
gzh-a2 | 192.168.88.139 |
1.Master端安装(gzh-cs8)
yum -y install https://repo.saltstack.com/py3/redhat/salt-py3-repo-latest.el8.noarch.rpm
yum -y install salt-master
2.Minion端安装(gzh-a1,gzh-a2)
yum -y install https://repo.saltstack.com/py3/redhat/salt-py3-repo-latest.el8.noarch.rpm
yum -y install salt-minion修改/etc/salt/minion文件
master: 192.168.88.137
id: saltminion1
3.链接测试
master端
[root@gzh-cs8 roles]# systemctl start salt-masterminion端
[root@gzh-a1 ~]# systemctl start salt-minion
[root@gzh-a2 ~]# systemctl start salt-minion
在master端测试
[root@gzh-cs8 ~]# salt-key
Accepted Keys:
Denied Keys:
Unaccepted Keys:
saltminion1
saltminion2
Rejected Keys:
如果没出现上面的内容关闭防火墙再试一下
链接
[root@gzh-cs8 ~]# salt-key -a saltminion1,saltminion2
The following keys are going to be accepted:
Unaccepted Keys:
saltminion1
saltminion2
Proceed? [n/Y] Y
Key for minion saltminion1 accepted.
Key for minion saltminion2 accepted.
[root@gzh-cs8 ~]# salt-key
Accepted Keys:
saltminion1
saltminion2
Denied Keys:
Unaccepted Keys:
Rejected Keys:
下面的模板用法就不写了,跟着书看一看和Ansible的用法差不多,我们直接进入实例
2.2部署LAMP环境
LAMP 为 Linux、Apache、MySQL、PHP 的简称,这是一个常规的 Web 服务器环境解决方案,使用其首字母缩写“LAMP”来引用。它是一个用于创建和管理 Web 应用程序的开源开发平台。Linux 用作后端操作系统(OS)。Apache 是Web 服务器,MySQL 是数据库,PHP 是脚本语言。
搭建LAMP环境需要编写三个模块: httpd,php,mysql
在/srv/salt目录下面创建state文件lamp.sls用来实现各部分的功能
[root@gzh-cs8 salt]# vim lamp.sls
[root@gzh-cs8 salt]# cat lamp.sls
###httpd模块###
install_httpd:
  pkg.installed:
    - name: httpd
http_running:
  service.running:
    - name: httpd
    - enable: Ture
    - require:
        - pkg: install_httpd
    - watch:
        - file: httpd_conf
        - file: php_conf
httpd_conf:
  file.managed:
    - name: /etc/httpd/conf/httpd.conf
    - source:
        salt: //httpd.conf
    - user: root
    - group: root
    - mode: 600
###php模块###
install_php:
  pkg.installed:
    - name: php_all
    - pkgs:
        - php
        - php-mysql
        - php-common
        - php-gd
        - php-mbstring
        - php-devel
        - php-xml
    - require:
        - pkg: install_httpd
php_conf:
  file.managed:
    - name: /etc/php.ini
    - source:
        salt: //php.ini
    - user: root
    - group: root
    - mode: 600
###mysql模块###
mysql_repo_install:
  cmd.run:
    - onlyif: [ ! -f /etc/yum.repos.d/mysql-community.repo ]
    - names:
        - rpm -ivh http://repo.mysql.com/mysql-community-release-sl7-5.noarch.rpm
install_mysql:
  pkg.installed:
    - name: mysql-community-server
    - pkgs:
        - mysql-community-client
        - mysql-community-devel
mysql_running:
  service.running:
- name: mysql这是书上的脚本,他把三个模块写在一起了,那你这里面运行肯定是报错的,因为里面的httpd.conf和php.ini配置文件都是不存在的,因为在实际的运维中,不同服务的配置文件是不一样的,所以,这里面的配置文件的操作实际上是将写好的配置文件上传到saltminion1节点上.因为不存在所以就会报错.
[root@gzh-cs8 ~]# cd /srv/salt/
[root@gzh-cs8 salt]# ls
httpd  mysql  php  top.sls
[root@gzh-cs8 salt]# tree .
.
├── httpd
│   ├── httpd.sls
│   └── index.php
├── mysql
│   ├── my.sh
│   └── mysql.sls
├── php
│   └── php.sls
└── top.sls

3 directories, 6 files
[root@gzh-cs8 salt]# cat httpd/httpd.sls
#安装httpd
httpd-install:
  pkg.installed:
    - name: httpd
#传输本地主页文件到远端
httpd-index:
  file.managed:
    - name: /var/www/html/index.php
    - source: salt://httpd/index.php
#开启服务
httpd-service:
  service.running:
    - name: httpd
    - enable: True
[root@gzh-cs8 salt]# cat httpd/index.php
<?php
phpinfo();
?>
[root@gzh-cs8 salt]# cat mysql/my.sh
#设置密码
mysqladmin password "guo123"
#创建数据库
mysql -u root --password="guo123" -e "create database if not exists mydb"
[root@gzh-cs8 salt]# cat mysql/mysql.sls
mysql-install:
  pkg.installed:
    - pkgs:
      - mariadb-server
      - mariadb

mysql-service:
  service.running:
    - name: mariadb
    - enable: True
#传送脚本并执行脚本
mysql-script:
  file.managed:
    - name: /tmp/my.sh
    - source: salt://mysql/my.sh
  cmd.run:
    - name: cd /tmp/ && chmod +x my.sh && ./my.sh
[root@gzh-cs8 salt]# cat php/php.sls
php-install:
  pkg.installed:
    - pkgs:
      - php
      - php-gd
      - php-ldap
      - php-odbc
      - php-pear
      - php-xml
      - php-xmlrpc
      - php-mbstring
      - php-snmp
      - php-soap
      - curl
      - libcurl-devel
      - php-bcmath
#重启httpd服务
httpd-stop:
  cmd.run:
    - name: systemctl restart httpd
[root@gzh-cs8 salt]# cat top.sls
base:
  'saltminion1':
    - httpd.httpd
    - mysql.mysql
    - php.php
[root@master ~]# salt 'saltminion1' state.highstate
#执行成功显示如下
Succeeded: 9
Failed: 0- 感谢你赐予我前进的力量
-
 微信
微信  支付宝
支付宝